Apache Flink 🚀
Apache Flink is a powerful framework and distributed processing engine that helps manage massive data streams and batch data. Whether you're just getting started or already familiar with stream processing, Flink has a place in your data pipeline. Let's walk through the process of installing Apache Flink on a Unix-like environment, specifically for Mac or Ubuntu users.
Installing Apache Flink ⚙️
Building Apache Flink on your machine can seem daunting, but with the right steps, you can get it up and running in no time. Typically, the installation process takes about 30 minutes.
Steps for Installing Apache Flink on Mac/Ubuntu 🛠️
To set up Apache Flink on your system, follow these steps:
- Prepare a Unix-like environment
Ensure you're working in a Unix-like environment such as Linux, Mac OS X, or Cygwin.
- Install Git
If Git is not installed, you'll need it to clone the Flink repository.
- Verify Java installation
Apache Flink requires Java. Check if Java is installed by running the following command in your terminal:
```bash
java -version
```
If it's not installed, you'll need to install it before proceeding.
- Install Maven
Maven is the build tool required for Flink. If Maven is not already installed, you can install it using Homebrew:
brew install maven
Maven plays a crucial role in the build process, so make sure this step is completed successfully.
- Download Apache Flink
Go to the Apache Flink downloads page and download the source version. Alternatively, you can clone the Flink repository from GitHub by executing the following command in your terminal:
git clone https://github.com/apache/flink
- Unpack the downloaded file
After downloading, navigate to the directory where the file is located and unpack the.tgzfile using the following command:
tar xzf *.tgz
Here, * represents the downloaded file name. On Mac, you can also double-click the tar file to unzip it.
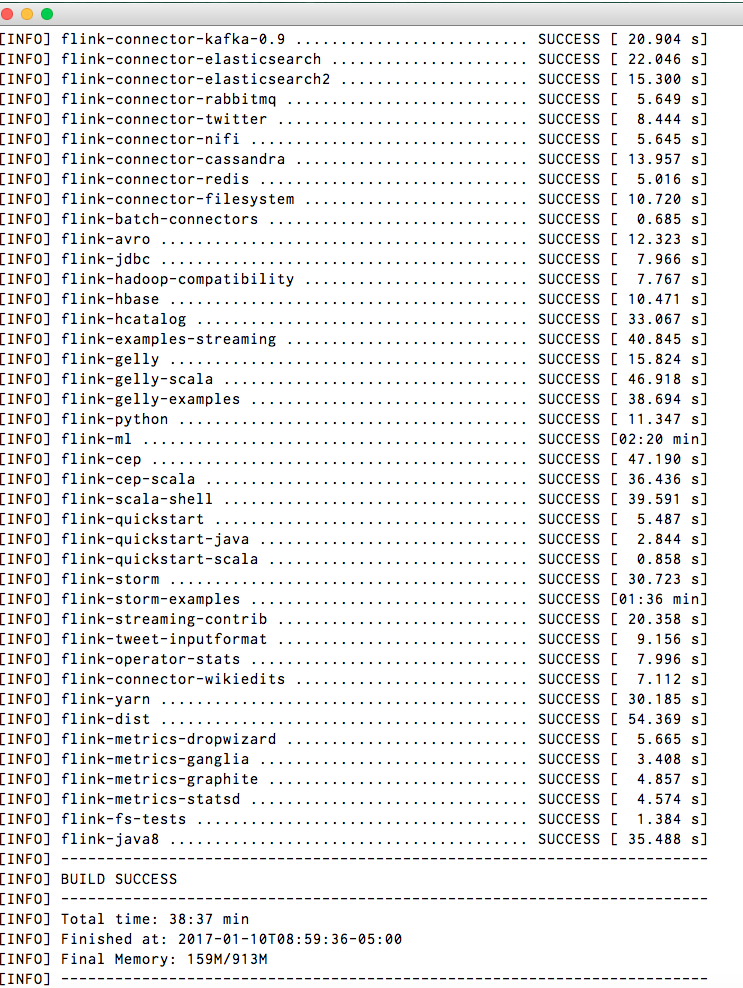
- Build Apache Flink
Once the file is unpacked, change to the directory of the extracted content and start the build process by running the command:
mvn clean install -DskipTests
The build process will take around 30 minutes. Once complete, if everything runs smoothly, you'll see a success message indicating that Apache Flink has been built successfully.
- Check the Installation Path
After installation, you can find Apache Flink installed at the following location on your system (replace YOUR_USER_NAME with your actual username):
/Users/YOUR_USER_NAME/.m2/repository/org/apache/flink
Success
Congratulations! You've successfully built Apache Flink on your system. 🎉
Final Thoughts 💡
Installing Apache Flink may seem complex at first, but by following these steps carefully, you’ll have a fully functional setup in no time. Flink's powerful data processing capabilities can now be harnessed to tackle real-time and batch data workloads.
Whether you're processing event streams or managing large-scale batch processing jobs, Flink is now at your fingertips to help you transform your data pipelines.
Happy coding! 🚀